


TIME REQUIRED: 2 Hours | DIFFICULTY: Average
This wasn't just an easy achievement since we usually set up an acoustic foam in a studio. Most of the time it's a challenge to figure out what you want and how to accomplish it. Having some acoustic panels isn't that difficult or costly, but it can add up the additional cost if you install it improperly.
The main goal when installing acoustic foams is to end up being prepared to shape a straightforward and succinct action plan, Understand what to look for, and content & scope of installation.
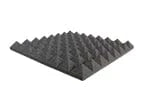
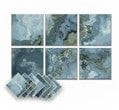
According to TheTechSpot, a Technology content creator on YouTube that ever since he install an Arrowzoom Hemisphere Grid Acoustic Foams, it has made a huge difference in his studio. After all, the main question is, where is the right place to install acoustic foams?


![]()

Step 1: Review what type of space do you have
So first, you should be certain about what your ultimate target is. Such as what type of space you are going to provide, and how much you need to produce to get the best outcome when you install the foams. It varies according to the needs of the space itself, and there is no such thing as "one-size fits all" when it comes to acoustic foams.

Step 2: Double-check the measurement
Double-check if all the measurements are correct. Measuring is very important because you can no longer reverse a cut of foam if your measurement is incorrect. You must keep in mind that this method is very important because it also helps you to achieve the best results. Slow and systematic solutions will lead you to a great outcome than mere thinking depending on your own gut instinct.

Step 3: Buy the right acoustic foam.
Spend some time online to determine on which acoustic foams to buy and their particular role. Overall, the safest option is to buy when you have a solid strategy in motion, and when you have made tentative videos or viewings, speeches, etc. Then you move on to decide what's the placement requires.

Step 4: Floor and Ceiling
You can use this to change the sound's "height." If you place diffusing panels in the floor and ceiling, you will get a sound that permeates both sides of the room. Highlighting one and attaching more absorbent panels to the other creates an upward or downward impact. In certain instances, this is not really practical, except for some unique implementations over a broad area.

Step 5: Sidewalls

If you don't consider paneling your sidewalls it will interact with the sound stream being produce. It may also cause some troublesome aspects such as noise displacement, where you would see the sound apparently "moved" from its original point in a big space. Therefore, you have completed such thorough and diligent tests before installation. Preferably, depending on the need and what the trouble areas are, you put various thick absorbing panels along certain walls.
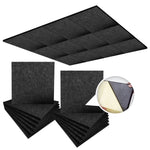
You can find that it's all a lot simpler to grasp and execute as you move through the measures and start practicing what you're reading here. Take a quick look at Arrowzoom's Black Hemisphere Grid Acoustic Foam.


USE 10% CODE: AZ-HACKSPOT